AutoReveal 300
General
Installation Manual
Installation Manual
No part of this publication may be duplicated or edited in any form or by any means, including any type of electronic or mechanical method without prior written permission from ShowTex.
ShowTex and its employees are fully aware of their task to provide a reliable edition of this document. Nevertheless, they cannot accept any form of liability for the direct or indirect consequences of imperfections that might remain in this edition. The material in this manual is subject to change without notice.
ShowTex warrants that its mechanical and technical products, when delivered in new condition, in original packing, sold directly and used in normal conditions are free from any defects in manufacturing, materials and workmanship. For more information about your local warranty terms, please check our website or contact your local ShowTex office.
All products from the ShowTex Rental range are supposed to be returned in the same state as they were rented. Please treat our products with care, allowing the next user to enjoy the products as much as you did. The rented products are internally checked according to the general rental conditions. Be sure to check our rental guidelines on our website before installing and using this product: ShowTex rental guidelines
Read and understand this user manual before installing and or operating the system. Failure to follow the instructions in this document could result in serious injury!
Following the guidelines of this manual will reduce the risk of damaging the equipment or injuring yourself and the people around you. Nevertheless, ShowTex cannot be held accountable for any use or misuse of the equipment and supplies.
Damage to the system caused by any other method of installation than the one shown in this manual can only be repaired or fixed at the customer’s expense.
As a result of the above warning, any ShowTex product must be installed and operated by a qualified technician who knows its capabilities as well as its limitations.
In case you are uncertain about the eligibility of any hardware in your product, please get in touch with your local ShowTex office to receive additional guidance.
Thank you for choosing for ShowTex and purchasing one of our products. We want to ensure that your experience is as smooth and safe as possible, so we kindly request that you take a few moments to carefully read this manual before installing your new system.
This manual contains important information that will help you comply with health and safety regulations, as well as provide guidance on how to safely install, operate and maintain your product. Our team has taken great care to ensure that this manual is easy to understand and follow, using straightforward language and clear illustrations.
If you have any questions or concerns regarding the installation or use of your product, please feel free to contact your local ShowTex office. Our knowledgeable team members are always available to assist you and answer any questions you may have.
Periodic, regularly scheduled maintenance inspections are essential for every product. Each system contains components that must be inspected, adjusted, maintained, or replaced over time. Establishing a consistent maintenance routine ensures long-term safety, reliability, and optimal performance.
Please follow the steps outlined in the Care & Maintenance schedule provided for this product. These steps represent the minimum required maintenance program.
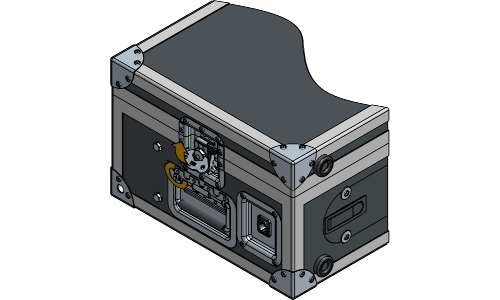
| Article number | Weight | Colour |
|---|---|---|
| 8160 7400 1007 | 32.00 kg | Black |

| Article number | Weight | Colour |
|---|---|---|
| 0000 0000 0000 | 1.60 kg | N/A |
| Article number | Weight | Colour |
|---|---|---|
| 8160 0950 0047 | 1.55 kg | Black |
| Article number | Weight | Colour |
|---|---|---|
| 8160 0950 0027 | 1.82 kg | Black |
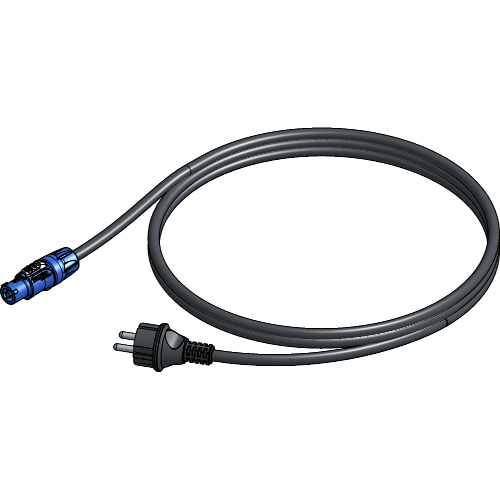
| Article number | Weight | Cable | Length | Colour |
|---|---|---|---|---|
| 8145 0912 0017 | 0.40 kg | True1 / Schuko | 2.00 m | Black |
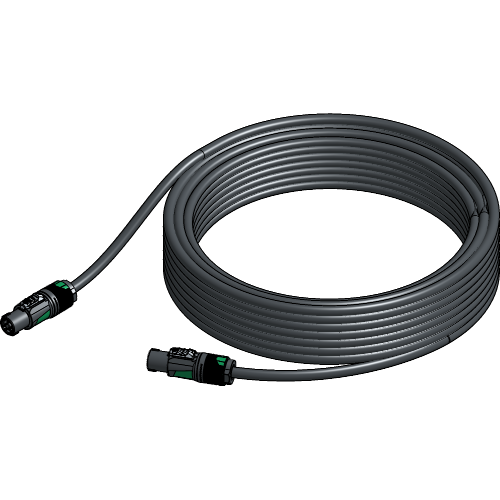
| Article number | Weight | Cable | Length | Colour |
|---|---|---|---|---|
| 8160 0915 0257 | 3.42 kg | SpeakON | 25.00 m | Black |
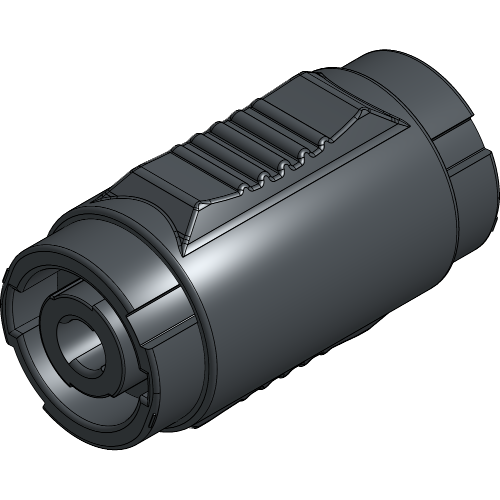
| Article number | Weight | Colour |
|---|---|---|
| 8160 7400 1207 | 0.05 kg | Black |

| Article number | Weight | Channels | Colour |
|---|---|---|---|
| 8160 7400 1307 | 0.07 kg | 1 | White |
| 8160 7400 1317 | 0.07 kg | 5 | White |
| 8160 7400 1327 | 0.07 kg | 10 | White |
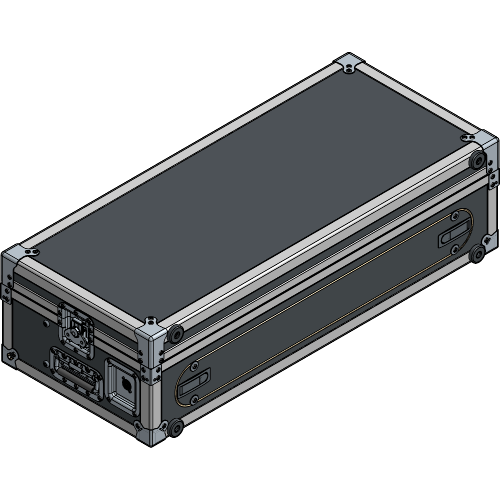
Unlock the Flightcase and remove the top lid. Take all loose components out of the Flightcase.

Open the front lid of the Flightcase.
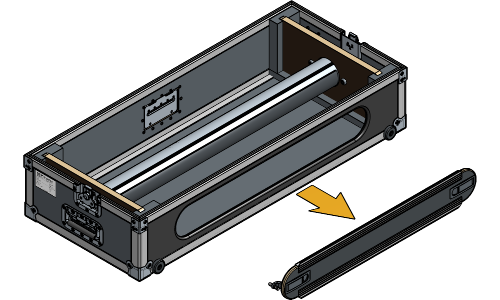
It is possible you have an older version of the Flightcase with a front lid that can’t be detached and opens with hinges.
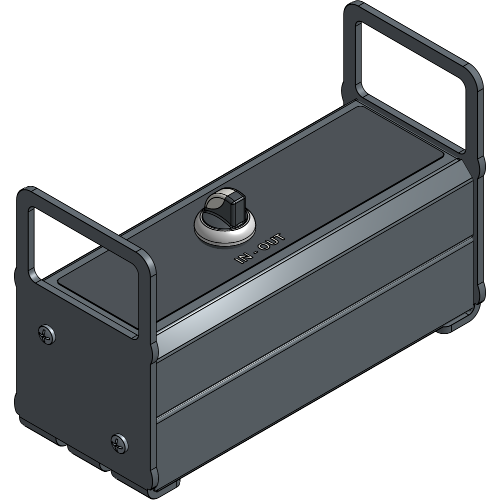
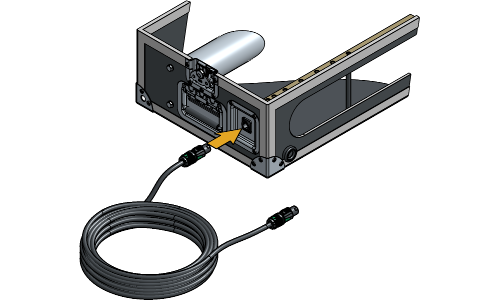
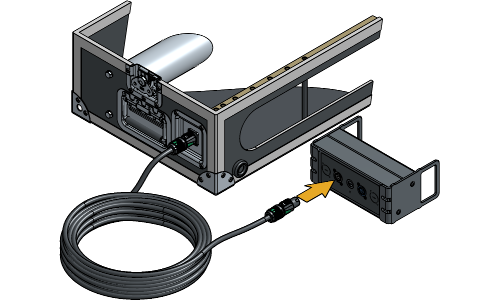
Plug the Power Extension Cable into the side connector of the Flightcase and the Remote.
Plug the Power Supply Cable in the Remote and in a power outlet.
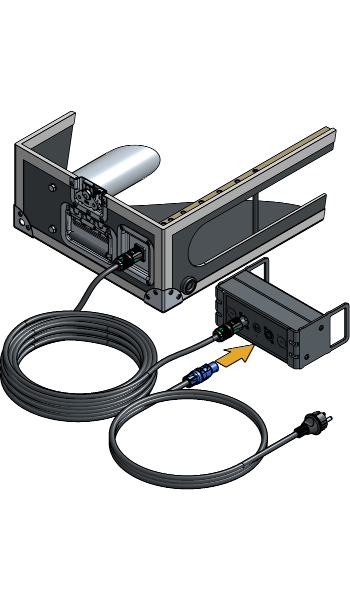
Ensure that all plugs are in their locked position. Having cables in an unlocked position may result in poor contact or no contact. If any cables are in an unlocked position, insert the plug and twist to lock the cable.
Position the Flightcase behind the object that will be revealed with the opening towards the back. Make sure that the components within the Flightcase are still easily accessible.
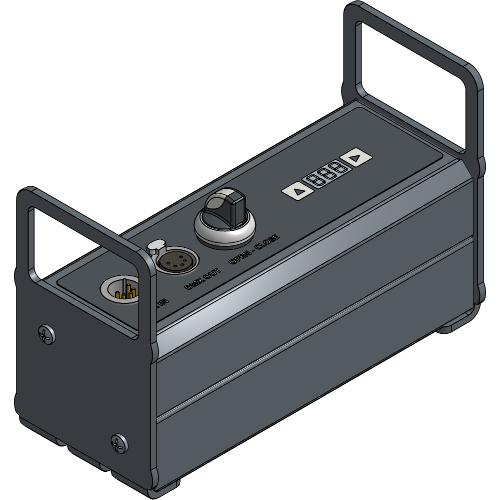
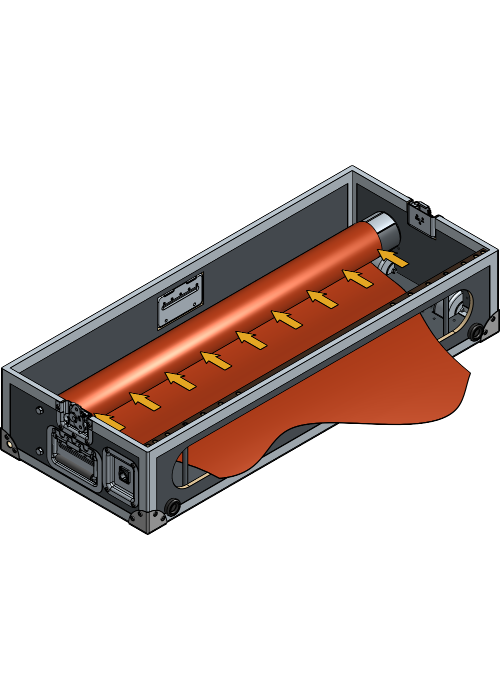
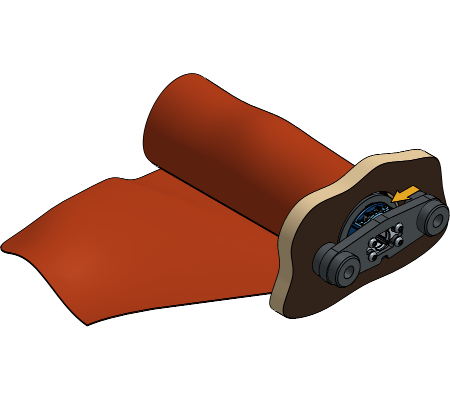
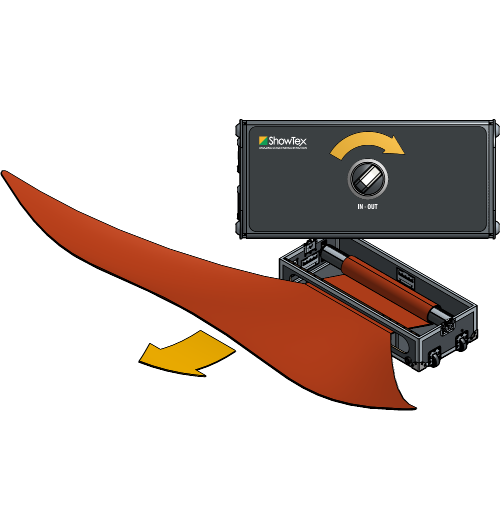
Place both Limit Switches on position 0 to remove all limits set on the roller.
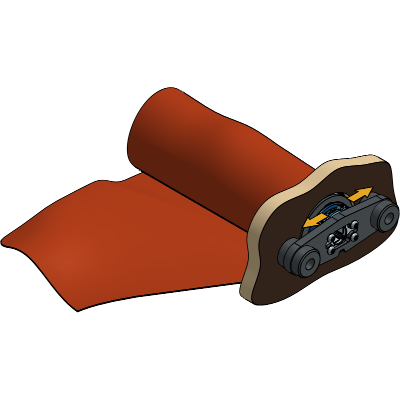
The arrows displayed on the Limit Switches serve as visual guides, indicating the rolling direction in which the roller has its limit set when placed on position 1.
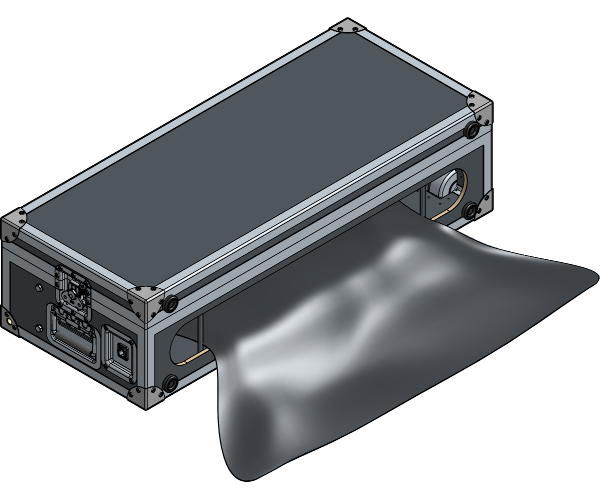
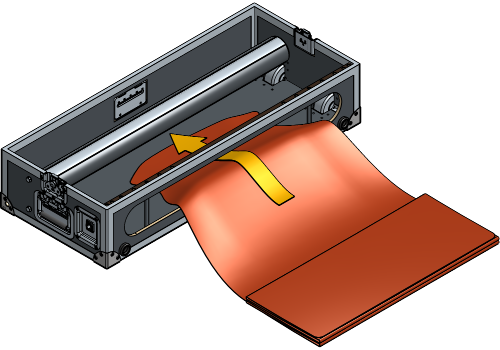
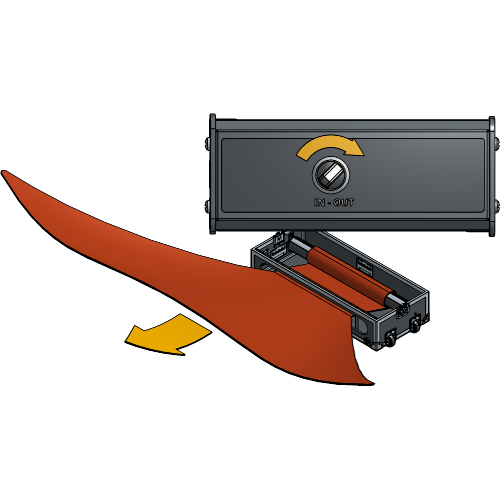
Guide the Reveal Fabric through the front opening, under and back over the roller. The visible side of the fabric during the reveal should face down.
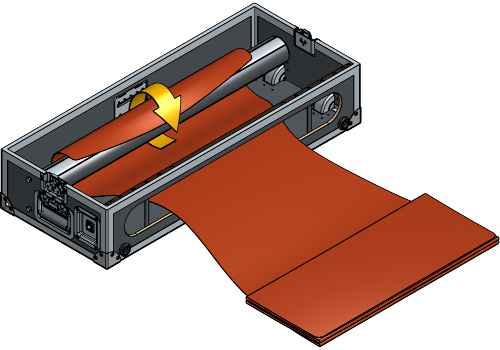
Attach the Hook & Loop strips of the Reveal Fabric onto the roller to securely fasten them together.
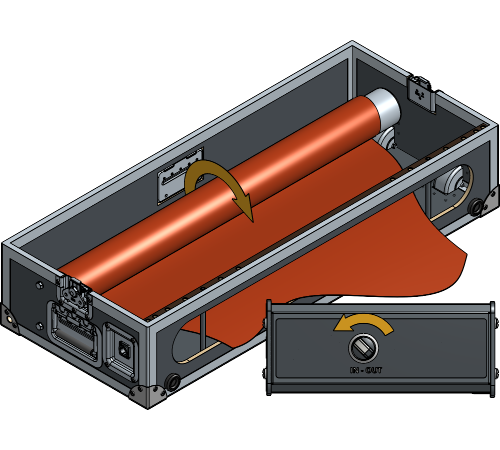
Due to the phases of your electric installation it is possible that the rolling direction is inverted compared to what is displayed on the remote. In this situation “in” will become “out”, and “out” will become “in”.
For permanent installations the wiring of the reveal system should be adjusted to match the “in” and “out” by one of our technicians. For rental it is advised to place a temporary sticker to avoid confusion.
Operate the roller, rolling it towards the front opening until a minimum of 1.5 turns of fabric are wrapped around the roller.
Place the lower Limit Switch on position 1. This will define the limit of the roller when the fabric is rolled out.
Cover the reveal object to verify there is enough fabric to hide the entire object when the fabric is rolled out.
If the reveal object is a lot smaller than the fabric it is advised to place the limit switch on position 0 again, then roll the fabric up to the right amount to cover the object and place the limit switch back on position 1.
Operate the roller, rolling the Reveal Fabric into the Flightcase and stop when it is about 50 cm out of the FlightCase.
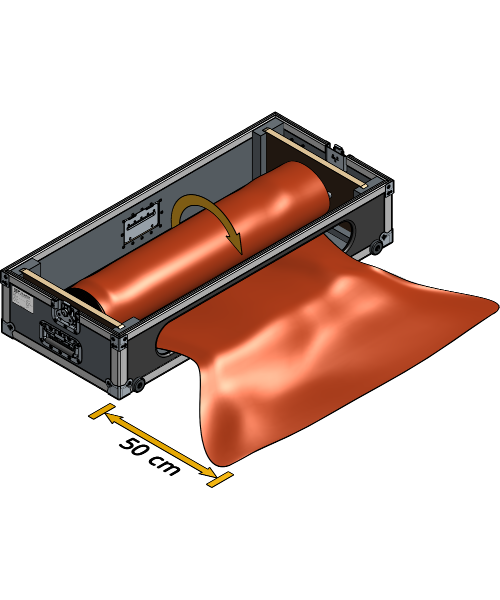
Ensure to maintain the 50 cm distance to prevent the first set Limit Switch to lose a turn. Allowing the Reveal Fabric to roll completely into the Flightcase may cause the roller to stop short of the intended limit after multiple reveals, resulting in a failed reveal.
Place the upper Limit Switch on position 1. This will define the limit of the roller when the fabric is rolled in.
Place the top lid back onto the Flightcase.
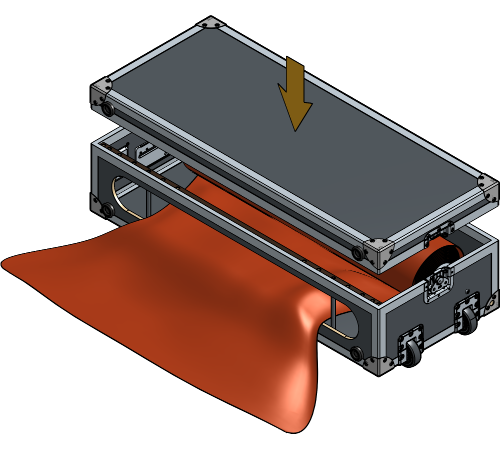
While it is optional to place the top lid onto the flightcase for the reveal, it enhances the safety of the reveal and prevents the fabric from getting stuck. Leaving the top lid off will decrease the height of the AutoReveal, but hold into account that the fabric could potentially roll up above the opening of the Flightcase.
Position the Flightcase in the desired location for the reveal.
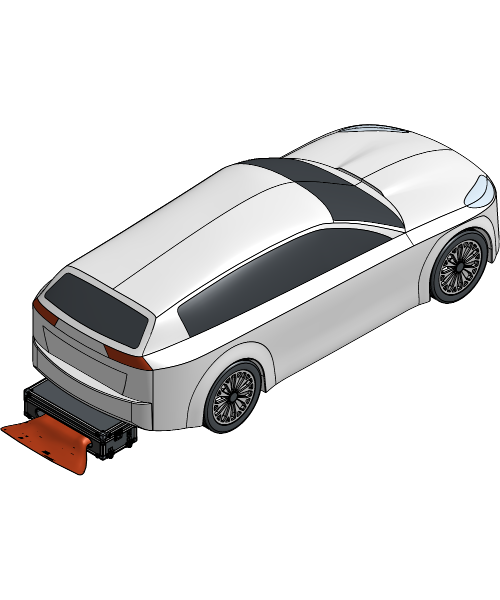
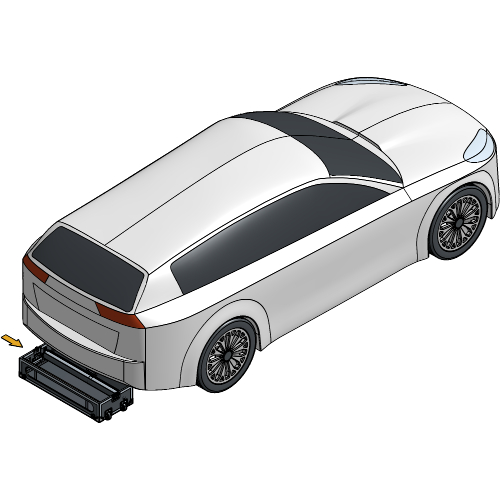
Remove the lid to place the AutoReveal under the rear end of a car.
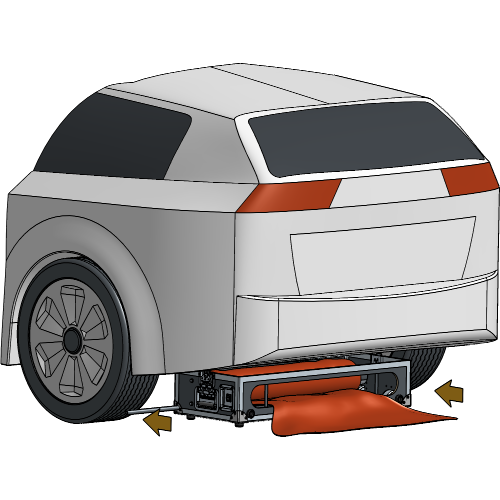
In situations where the AutoReveal does not fit underneath a car, consult the Troubleshooting at the end of this installation manual.
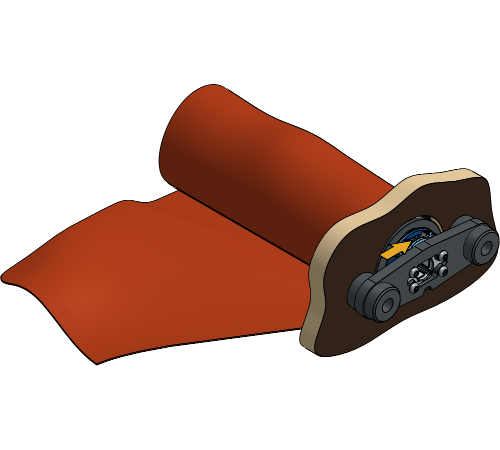
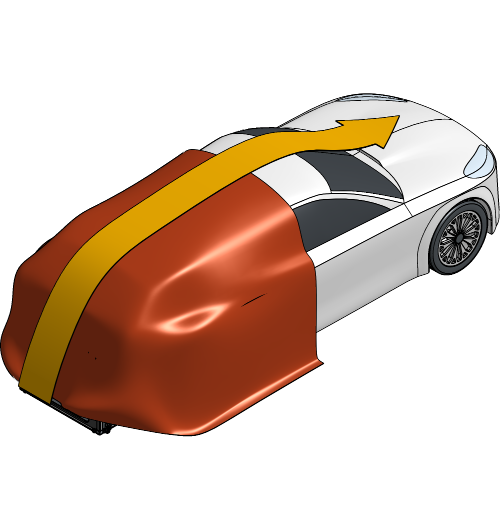
Operate the roller to unroll the fabric. The fabric should be pulled out and under tension continuously while operating the roller.
Cover the reveal object to prepare for a test run.
Make sure the Reveal Fabric hangs loose on top of the reveal object, freely on the floor and can’t get stuck under or between the reveal object. If the Reveal Fabric gets stuck during the reveal, it may result in a damaged fabric.
To prevent damage to the Reveal Fabric, apply tape or other protective measures to any sharp edges on the reveal object.
To test the AutoReveal 300 before showtime, operate the roller with the Remote to reveal the object. Look for irregularities and correct the finished position of the fabric if necessary by adjusting the limit switches.
Operate the roller again to unroll the fabric. The fabric should be pulled out and under tension continuously while operating the roller.
Make sure all testing is done well before the show to prevent the motor from overheating.
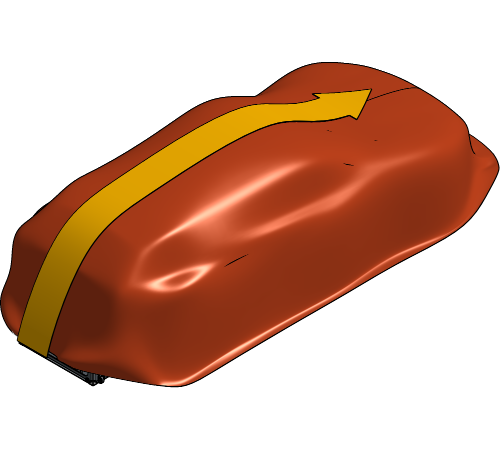
Cover the reveal object to prepare for showtime.
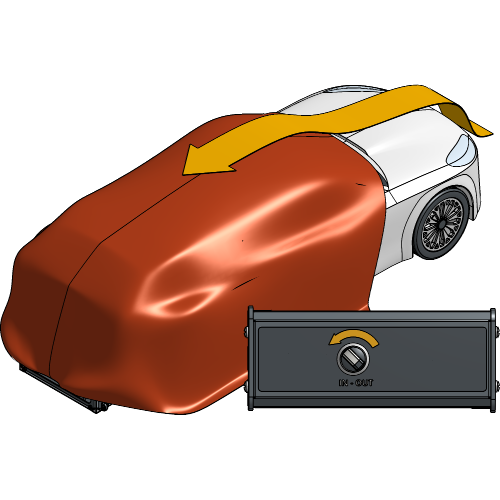
When it’s showtime, operate the AutoReveal 300 with the Remote to reveal the object.
If there occur problems while doing the reveal, consult our AutoReveal 300 Troubleshooting to get it back up and running.
Your AutoReveal 300 setup is now completely installed and ready to use!
For more technical assistance, please contact your local ShowTex
office.
The address and contact information can be found on our website:
www.showtex.com